Dog Ear Cleaning Guide: Safe Steps & Vet Warning Signs, A dog’s ears can be easy to overlook until something goes wrong. One day your dog seems perfectly comfortable, and the next you may notice head shaking, scratching, redness, an unusual smell, or dark discharge coming from the ears.
Regular ear care can help you spot problems early and keep your dog more comfortable. However, cleaning a dog’s ears is not simply a matter of putting a cotton swab inside and wiping everything away. Cleaning too aggressively—or cleaning ears that are already painful or infected—can make the situation worse.
The good news is that basic ear care can be simple when you know what to do.
In this guide, we’ll explain how to clean a dog’s ears safely, how often ear cleaning may be needed, what supplies you should use, common mistakes to avoid, and which warning signs mean it is time to contact a veterinarian.
Why Dog Ear Cleaning Matters
A dog’s ear canal has a natural system for moving wax and debris outward. Some dogs may rarely need their ears cleaned, while others require more frequent attention because of their ear shape, allergies, swimming habits, or tendency to produce excess wax.
Keeping the outer ear clean can help remove accumulated dirt and debris. It also gives you an opportunity to look for changes that could indicate a developing problem.
Healthy dog ears generally should not have a strong unpleasant odor. The skin should not appear severely red, swollen, or irritated, and your dog should not react as though the ears are painful when they are gently handled.
Ear cleaning should therefore be viewed as preventive grooming—not a replacement for veterinary treatment.
If your dog already has significant pain, swelling, discharge, bleeding, or a strong foul odor, cleaning at home may not be the appropriate first step.
How Often Should You Clean Your Dog’s Ears?
There is no single cleaning schedule that works for every dog.
Some dogs may need occasional cleaning, while others may need more frequent care. Factors that can influence ear-cleaning needs include:
- Ear shape and size
- Amount of hair around the ear
- Swimming and bathing habits
- Wax production
- Skin allergies
- Previous ear problems
- Environmental exposure
- Your veterinarian’s recommendations
Cleaning healthy ears too frequently can potentially irritate the delicate skin inside the ear canal.
Instead of following a strict calendar, pay attention to your dog’s individual needs. During normal grooming, gently inspect the visible part of the ears. If they look clean and your dog has no symptoms, there may be no reason to clean them immediately.
For dogs that repeatedly develop ear problems, speak with your veterinarian about an appropriate maintenance routine.

Signs Your Dog’s Ears May Need Attention
One of the most useful parts of ear care is knowing what changes to watch for.
Contact your veterinarian if you notice symptoms such as:
- Frequent head shaking
- Repeated ear scratching
- Red or swollen ears
- Strong or unpleasant odor
- Excessive wax
- Unusual discharge
- Crusting around the ear
- Sensitivity when the ear is touched
- Holding one ear differently from the other
- Whining or discomfort
- Loss of balance or unusual coordination
These symptoms can have different causes. Ear infections, allergies, parasites, foreign material, inflammation, and other conditions can produce similar signs.
That is why it is important not to assume every dirty-looking ear simply needs more cleaning.
What You Need Before Cleaning Your Dog’s Ears
If your veterinarian has advised routine ear cleaning, prepare everything before you begin.
You may need:
- A veterinarian-recommended dog ear-cleaning solution
- Cotton balls or soft cotton pads
- A clean towel
- Treats for positive reinforcement
- A comfortable, quiet location
Avoid improvising with household chemicals or products that were not designed for dogs.
It is also helpful to choose a location where your dog feels relaxed. Trying to clean the ears while your dog is frightened or struggling can turn a simple grooming routine into a stressful experience.
Start slowly and reward calm behavior.
The goal is not to force your dog through the process. The goal is to help your dog gradually become comfortable with gentle ear care.
Before You Start: Look at the Ear
Before applying any cleaning solution, inspect the visible portion of the ear.
Look for obvious redness, swelling, discharge, wounds, bleeding, or anything unusual.
Also pay attention to your dog’s reaction. If your dog pulls away suddenly, cries, snaps, or appears painful when the ear is touched, stop.
Pain can be an important sign that something more serious is happening.
A healthy-looking ear and a painful ear should not be treated the same way.
How to Clean a Dog’s Ears Safely
Step 1: Choose a Calm Environment
Pick a quiet area without loud noises or distractions.
Allow your dog to sniff the supplies before you begin. Give a small treat and praise calm behavior.
For dogs that are nervous about grooming, you may want to practice touching the outside of the ear for a few days before attempting a full cleaning.
Step 2: Gently Hold the Ear
Lift the ear flap carefully so you can see the opening of the ear canal.
Do not pull hard or bend the ear into an uncomfortable position.
Your dog should remain as relaxed as possible.
Step 3: Apply the Recommended Ear Cleaner
Use the ear-cleaning product according to its label and your veterinarian’s instructions.
Avoid putting homemade mixtures into the ear unless your veterinarian specifically recommends them.
Do not use products intended for humans unless a veterinary professional has specifically instructed you to do so.
Step 4: Massage the Base of the Ear
After applying the appropriate cleaner, gently massage the base of the ear for several seconds.
You may hear a soft squishing sound as the liquid moves around the ear canal.
Keep the massage gentle.
If your dog shows signs of pain, stop and contact your veterinarian.
Step 5: Allow Your Dog to Shake
Many dogs naturally shake their heads after ear cleaning.
This can help move loosened debris toward the outer portion of the ear.
It is a good idea to use a towel or clean the ears in an easy-to-clean area because some solution and debris may be shaken out.
Step 6: Wipe the Visible Area
Use a cotton ball or soft cotton pad to gently wipe away loosened debris from the visible outer portion of the ear.
Only clean areas you can easily see.
Never force a cotton swab deep into your dog’s ear canal.
Step 7: Reward Your Dog
Finish with praise, affection, and a suitable treat.
Positive reinforcement can make future ear-cleaning sessions much easier.
Over time, your dog may learn that ear care does not have to be frightening or uncomfortable.
Why Cotton Swabs Can Be a Problem
Cotton swabs may look convenient, but they can create problems when used deep inside a dog’s ear.
Pushing material into the ear canal can:
- Move wax and debris deeper
- Irritate delicate tissue
- Cause injury if the dog suddenly moves
- Make it harder to see what is happening inside the ear
A cotton ball or soft pad is generally more appropriate for wiping the parts of the ear that you can safely see.
The rule is simple: clean gently and stay within the visible area unless a veterinary professional has shown you otherwise.

Never Ignore Pain During Ear Cleaning
A dog that strongly resists ear cleaning may not simply be “being difficult.”
Painful ears can make even normally friendly dogs defensive.
If your dog suddenly becomes uncomfortable when you touch one ear, stop the cleaning process.
Other warning signs include crying, snapping, hiding, excessive head shaking, or trying to escape.
These behaviors should be taken seriously.
An underlying ear problem may require examination and targeted treatment rather than repeated cleaning.
Common Dog Ear-Cleaning Mistakes
Even owners with good intentions can accidentally make ear problems worse.
Cleaning Too Often
More cleaning is not always better.
Excessive cleaning can irritate the ear canal and interfere with the ear’s natural environment.
Follow a routine appropriate for your individual dog rather than cleaning every day without a reason.
Using the Wrong Products
Human ear products, alcohol-based substances, harsh disinfectants, essential oils, and homemade solutions can be inappropriate or irritating.
Choose products specifically formulated for dogs and follow professional guidance when your dog has recurring ear problems.
Cleaning Too Deeply
You do not need to dig into the ear canal to make the ear look spotless.
Deep cleaning without proper instruction can cause injury or push debris farther inside.
Ignoring Symptoms
An unpleasant smell or repeated scratching should not automatically be treated as a grooming problem.
These signs can indicate an underlying condition.
Forcing a Nervous Dog
Holding a frightened dog tightly and continuing despite struggling can create fear around future grooming.
Instead, introduce ear care gradually and use positive reinforcement.
If the dog remains extremely distressed, professional assistance may be appropriate.
Which Dogs May Need Extra Ear Attention?
Some dogs are more likely to experience ear problems than others.
Dogs with floppy ears may have less airflow around the ear canal. Dogs that swim frequently can also need closer monitoring because moisture can remain in the ear.
Dogs with allergies or recurring skin problems may also experience repeated ear inflammation.
Breeds commonly associated with ear problems include dogs such as:
- Cocker Spaniels
- Basset Hounds
- Golden Retrievers
- Labrador Retrievers
- Poodles
- Beagles
However, any dog can develop an ear problem, regardless of breed.
Good ear care is therefore about observing your own dog rather than assuming that breed alone determines how often cleaning is necessary.
What About Hair Inside the Ears?
Ear hair can be a complicated subject.
Some dogs naturally have more hair around or inside their ears. Removing too much hair unnecessarily can irritate the skin.
Do not automatically pluck or shave ear hair simply because you can see it.
If your dog has excessive hair that interferes with ear health, ask your veterinarian or a qualified professional groomer whether trimming is appropriate.
When Cleaning Is Not Enough
Ear cleaning can help with routine hygiene, but it cannot treat every underlying cause of ear disease.
If your dog has an infection, allergy-related inflammation, parasites, a foreign object, or another medical condition, the appropriate treatment depends on the actual cause.
A dog with repeated ear problems may temporarily improve after cleaning and then develop symptoms again.
That pattern is worth discussing with a veterinarian.
The goal should be to identify why the problem keeps returning, not simply clean the ears repeatedly.
When Should You Take Your Dog to the Vet?
Veterinary attention is especially important if your dog has:
- Severe ear pain
- Significant swelling
- Bleeding
- Pus-like discharge
- A very strong foul odor
- Persistent head shaking
- Repeated ear scratching
- Loss of balance
- Sudden hearing changes
- A foreign object in the ear
- Symptoms that keep returning
Balance problems can be particularly concerning because deeper ear structures can be involved.
When in doubt, it is safer to ask a veterinarian before attempting extensive home treatment.
Final Thoughts
Healthy ears are an important part of your dog’s overall comfort and grooming routine.
The best approach is not to clean as aggressively or as frequently as possible. Instead, focus on regular observation, gentle cleaning when appropriate, suitable products, and early attention to unusual symptoms.
If your dog’s ears look healthy and your veterinarian has recommended routine cleaning, a calm and gentle cleaning routine can become a simple part of regular grooming.
But if you notice pain, strong odor, unusual discharge, swelling, persistent scratching, or repeated ear problems, do not rely on cleaning alone.
Your dog cannot tell you exactly what is hurting, so paying attention to small changes can make a big difference.
A few minutes of gentle ear care and observation can help you recognize problems earlier—and help your dog stay comfortable, happy, and healthy.
What Do Healthy Dog Ears Look Like?
Before you start cleaning your dog’s ears, it helps to know what normal looks like.
Healthy ears usually have a relatively clean appearance with no strong unpleasant smell. A small amount of natural wax can be normal. The skin should not look severely swollen, intensely red, or obviously irritated.
Remember that every dog is slightly different. The amount and color of normal ear wax can vary.
The important thing is to notice changes from your dog’s usual condition.
If your dog normally has clean ears but suddenly develops a strong odor and dark discharge, that change deserves attention.
Understanding Ear Wax
Ear wax is not automatically a sign that something is wrong.
The ear produces wax as part of its natural protective process. Wax can help trap particles and protect the skin of the ear canal.
Problems can arise when there is excessive buildup, an unusual change in appearance, or other symptoms such as itching, redness, odor, or pain.
Instead of trying to remove every tiny trace of wax, focus on keeping the visible ear reasonably clean without irritating the skin.
Why Dogs Shake Their Heads
An occasional head shake is usually not something to panic about.
Dogs may shake their heads after waking up, playing, bathing, or getting something minor around their ears.
However, frequent or persistent head shaking is different.
If your dog repeatedly shakes its head throughout the day, scratches at the ears, or seems uncomfortable, investigate the cause rather than simply cleaning the ears again and again.
Possible causes can include irritation, allergies, infection, parasites, or something trapped inside the ear.
A veterinarian can determine the cause and recommend appropriate treatment.
Can You Clean a Dog’s Ears After a Bath?
Bathing can leave moisture around the ears, particularly in dogs with floppy ears.
After a bath, gently dry the outside of your dog’s ears with a clean towel.
Do not push towels, cotton swabs, or other objects deep into the ear canal.
If your dog is prone to recurring ear problems after bathing or swimming, ask your veterinarian whether a specific drying or cleaning product is appropriate.
Dog Ear Cleaning After Swimming
Dogs that regularly swim may need closer ear monitoring.
Water can enter the ears during swimming, and some dogs are more sensitive to moisture than others.
After swimming:
- Gently inspect the ears.
- Dry the visible outer ear.
- Watch for unusual odor or discharge.
- Monitor your dog for head shaking or scratching.
- Follow any ear-care routine recommended by your veterinarian.
Do not automatically use an ear-cleaning solution after every swim unless it is appropriate for your dog.
How to Make Ear Cleaning Less Stressful
One of the biggest mistakes owners make is waiting until the dog has a serious ear problem before introducing ear handling.
Instead, teach your dog that gentle ear handling can be a normal part of life.
Start with short sessions.
Touch the outside of the ear.
Give praise.
Offer a small reward.
Then stop.
Over several sessions, gradually increase the amount of handling.
This approach can be especially helpful with puppies, but older dogs can learn it too.
The objective is to create a positive association instead of turning ear cleaning into a struggle.
A Simple Ear-Care Routine
You don’t necessarily need a complicated grooming schedule.
A simple routine can include:
Weekly observation:
Take a quick look at your dog’s ears during normal grooming.
After swimming:
Check and gently dry the visible outer ear.
During grooming:
Look for changes in smell, redness, discharge, or sensitivity.
When something changes:
Contact your veterinarian rather than repeatedly treating the symptom yourself.
This simple approach can help you notice abnormalities before they become more serious.
The Most Important Rule
The most important rule of dog ear care is:
Don’t put something into your dog’s ear just because you think it might help.
Dogs’ ears are sensitive structures. A product that sounds harmless may not be suitable for every situation.
When your dog has persistent symptoms, professional diagnosis is more useful than experimenting with multiple home remedies.
Good ear care is about protecting your dog’s ears—not simply making them look clean.
Quick Takeaway
A healthy ear-care routine should be gentle, consistent, and based on your dog’s individual needs.
Observe first. Clean only when appropriate. Avoid deep cleaning. Never ignore pain or persistent symptoms. And when something doesn’t look right, involve your veterinarian.
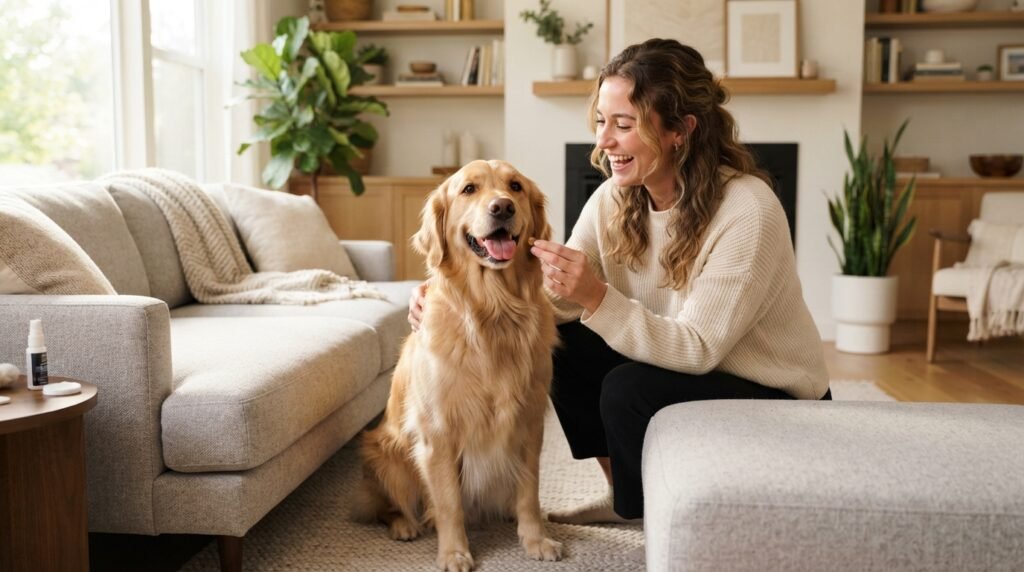
Common Dog Ear Problems and Warning Signs
Your dog’s ears can sometimes reveal that something is wrong before other symptoms become obvious. A little extra scratching, repeated head shaking, or a new smell may seem minor at first, but these changes can sometimes indicate an underlying ear problem.
Understanding the most common causes can help you recognize when routine grooming is appropriate and when professional veterinary care is needed.
1. Dog Ear Infections
Ear infections are among the most common reasons dogs develop ear discomfort.
A dog with an ear infection may:
- Shake its head repeatedly
- Scratch the affected ear
- Rub the ear against furniture or the floor
- Develop an unpleasant odor
- Have redness or swelling
- Develop unusual discharge
- React painfully when the ear is touched
Some dogs may also become less interested in play because they are uncomfortable.
An important point for owners is that not every ear infection has the same cause. Different types of organisms or underlying conditions can be involved, so treatment should be based on veterinary assessment rather than simply choosing a random ear medication.
2. Allergies and Ear Problems
Allergies can contribute to recurring ear irritation in some dogs.
A dog dealing with allergies may have itching in several areas of the body, including the ears and paws. Some dogs may repeatedly develop ear problems even after temporary improvement.
If your dog’s ear problems keep returning, don’t assume that the ears simply need more frequent cleaning.
Ask your veterinarian whether allergies or another underlying condition could be contributing to the problem.
Finding the underlying trigger can be much more useful than repeatedly treating the visible symptoms.
3. Ear Mites
Ear mites are tiny parasites that can cause intense itching and irritation.
They are more commonly associated with cats, but dogs can also be affected.
Possible signs include:
- Persistent scratching
- Frequent head shaking
- Dark debris inside the ear
- Irritated skin
- Sensitivity around the ears
Dark material inside an ear does not automatically mean your dog has ear mites. Other conditions can create similar-looking debris.
That is another reason why diagnosis matters.
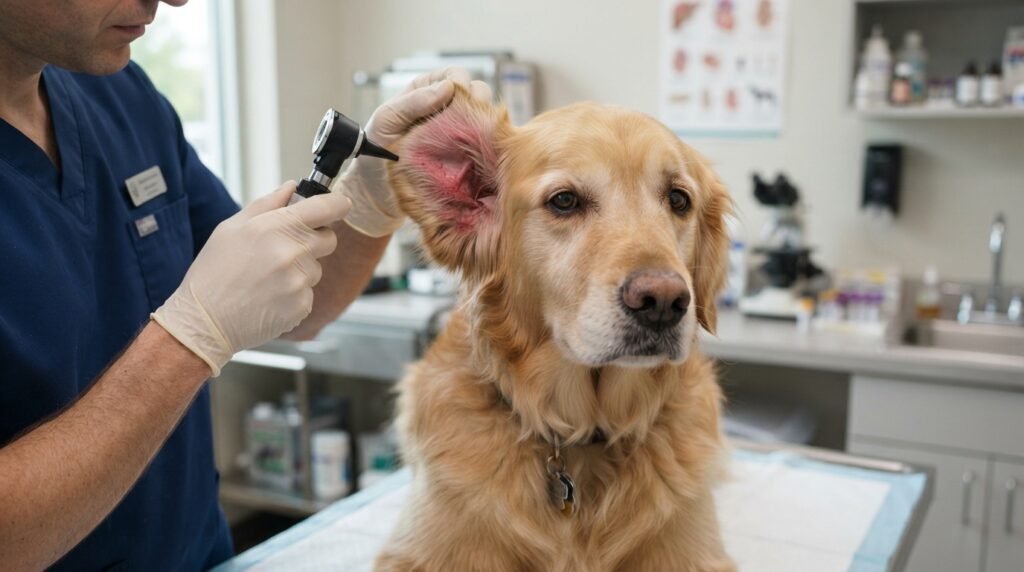
4. Foreign Objects
Sometimes the problem isn’t an infection at all.
Grass seeds, plant material, dirt, or other small objects can become lodged in or around a dog’s ear.
You may notice sudden head shaking, pawing at one ear, or discomfort that appears shortly after a walk outdoors.
If you suspect something is stuck inside the ear, don’t attempt to dig around with tweezers or cotton swabs.
A veterinarian can examine the ear safely and determine whether a foreign object needs to be removed.
5. Excessive Moisture
Moisture can be an issue for dogs that frequently swim or have ears that remain damp after bathing.
This doesn’t mean every dog needs aggressive ear cleaning after getting wet.
Instead, gently dry the visible outer ear and monitor your dog for changes.
If your dog frequently develops ear problems after swimming, ask your veterinarian about a suitable preventive routine.
6. Ear Hematomas
An ear hematoma can occur when blood collects within the ear flap, sometimes following vigorous head shaking or scratching.
The ear flap may suddenly appear swollen or feel different from normal.
An ear hematoma should be evaluated by a veterinarian.
Do not try to drain a swollen ear flap yourself.
Treating only the swelling may not address the reason your dog was shaking or scratching in the first place.
Why Repeated Ear Problems Matter
One of the biggest mistakes dog owners can make is treating every episode as an isolated problem.
Imagine your dog develops an unpleasant-smelling ear.
You clean it.
The smell improves.
A few weeks later, the smell returns.
You clean it again.
This cycle may continue for months.
While cleaning may remove some debris, it does not necessarily address the underlying cause.
Recurring ear problems can be associated with allergies, anatomical factors, moisture, chronic inflammation, or other conditions.
When symptoms repeatedly return, your veterinarian can help investigate the bigger picture.
Signs That Should Not Be Ignored
Some symptoms deserve prompt attention.
Contact a veterinarian if you notice:
Severe Pain
If your dog cries, snaps, or strongly resists when you approach the ear, stop trying to clean it.
Significant Swelling
A swollen ear flap or swollen ear canal should be evaluated rather than treated with household remedies.
Blood
Blood inside or around the ear is not something to simply wipe away and ignore.
Thick or Unusual Discharge
Unusual discharge can be associated with infection or inflammation and may require veterinary treatment.
Strong Odor
A sudden, persistent, unpleasant smell is a reason to investigate what is happening inside the ear.
Balance Problems
If your dog appears dizzy, unsteady, or has trouble walking normally, seek veterinary attention promptly.
Persistent Head Shaking
Occasional head shaking can be normal. Constant or repeated shaking deserves attention.
What Not to Put in Your Dog’s Ears
The internet contains countless home remedies for dog ear problems.
That doesn’t mean they’re safe.
Avoid experimenting with substances such as:
- Undiluted vinegar
- Alcohol
- Hydrogen peroxide
- Essential oils
- Harsh disinfectants
- Human ear medications
- Random homemade mixtures
Some substances may irritate already-inflamed tissue or be inappropriate for a particular ear condition.
If you’re unsure about a product, ask your veterinarian before using it.
Don’t Assume Human Products Are Safe
A product designed for people isn’t automatically suitable for dogs.
Dogs have different anatomy, different sensitivities, and different medical needs.
Even if a human product seems gentle, it may not be appropriate for your dog’s ears.
Use products specifically intended for dogs and follow the instructions provided by the manufacturer or your veterinarian.
Why Diagnosis Comes Before Treatment
Several different ear conditions can produce similar symptoms.
For example, scratching and odor could be associated with infection, allergies, parasites, or another problem.
A veterinarian can examine the ear and determine what is actually happening.
This is particularly important when symptoms are severe, persistent, or recurring.
Treating the wrong condition can waste time and potentially allow the underlying problem to continue.
How Owners Can Prevent Future Problems
You cannot prevent every ear problem, but good habits can reduce unnecessary irritation and help you identify changes earlier.
Keep your dog’s ears clean when cleaning is actually needed.
Keep the visible outer ears dry after bathing.
Monitor dogs that swim frequently.
Maintain regular grooming.
Pay attention to allergies and skin problems.
Most importantly, learn what is normal for your individual dog.
If you know how your dog’s ears normally look and smell, unusual changes become easier to recognize.
Dog ear problems should never be judged by appearance alone.
A dirty-looking ear may need routine cleaning, while a painful or foul-smelling ear may need veterinary treatment.
The safest approach is to observe first, clean gently when appropriate, and seek professional advice whenever symptoms are persistent, severe, or unusual.
Your dog’s ears don’t need to be perfectly spotless.
They need to be healthy, comfortable, and properly cared for.
Step-by-Step Dog Ear Cleaning Routine
Cleaning your dog’s ears doesn’t have to become a stressful battle. With the right preparation, a suitable dog ear-cleaning solution, and a gentle approach, routine ear care can become a simple part of your dog’s grooming routine.
The key is to remember that ear cleaning is about gentle maintenance, not aggressive scrubbing.
Before beginning, make sure your dog isn’t showing signs of severe pain, bleeding, major swelling, or significant discharge. If those symptoms are present, speak with your veterinarian before attempting routine cleaning.
Step 1: Gather Everything First
Prepare your supplies before bringing your dog into the cleaning area.
You’ll typically want:
- A veterinarian-recommended dog ear cleaner
- Cotton balls or soft cotton pads
- A clean towel
- A few small dog treats
- A comfortable place to sit
- Good lighting
Having everything ready means you won’t have to leave your dog halfway through the process.
Step 2: Help Your Dog Relax
Don’t immediately grab your dog’s ears and start cleaning.
Give your dog a few moments to relax.
Let your dog sniff the bottle and cotton pads. Offer praise and a treat for calm behavior.
If your dog is already nervous, spend a few sessions simply touching the outside of the ears without cleaning them.
This can help your dog understand that ear handling isn’t automatically something scary.
Step 3: Examine the Outer Ear
Lift the ear flap gently and look at the visible area.
Check for:
- Redness
- Swelling
- Unusual discharge
- Crusts
- Excessive wax
- Wounds
- Strong odor
Also notice whether your dog reacts when you touch the ear.
If the ear appears painful, stop.
Routine cleaning isn’t appropriate for every situation.
Step 4: Apply the Ear Cleaner Correctly
If your veterinarian has recommended a specific ear-cleaning product, follow its instructions carefully.
Avoid guessing how much product to use.
Do not substitute household liquids simply because they are inexpensive or easy to find.
The goal is to use a product formulated for canine ear care and appropriate for your dog’s situation.
Step 5: Massage the Ear Base
After applying the recommended cleaner, gently massage the base of the ear.
Use your fingertips rather than squeezing or pulling the ear.
A gentle massage can help distribute the solution through the ear canal.
Keep the process calm and controlled.
If your dog suddenly shows pain, stop.
Step 6: Let Your Dog Shake
Many dogs will naturally shake their heads after ear cleaning.
That’s normal.
Allowing your dog to shake can help loosened material move toward the outside of the ear.
This is one reason why ear cleaning is best performed in an easy-to-clean location.
You may want to keep a towel nearby.
Step 7: Wipe Away Visible Debris
Once your dog has shaken its head, use a soft cotton ball or cotton pad to gently wipe the visible portion of the ear.
Don’t force anything deep into the canal.
If debris remains deep inside and you cannot safely reach it, don’t keep digging.
That is a situation where professional cleaning may be safer.
Step 8: Keep the Experience Positive
Once you’re finished, reward your dog.
Give praise, affection, or a small treat.
Then let your dog return to normal activities.
You want your dog to learn:
Ear cleaning → calm experience → reward.
This positive association can make future sessions much easier.
What If Your Dog Refuses to Cooperate?
Not every dog will happily sit still while someone handles its ears.
Some dogs are naturally sensitive around their heads. Others may have had a painful ear experience in the past.
Never turn ear cleaning into a wrestling match.
If your dog becomes highly stressed:
- Stop the session.
- Give your dog time to relax.
- Reward calm behavior.
- Try again another day.
- Consider professional grooming assistance.
- Contact your veterinarian if pain may be involved.
Forcing the process can increase fear and make future grooming much harder.
How to Help a Puppy Accept Ear Cleaning
Puppyhood is an excellent time to introduce basic ear handling.
You don’t need to start with actual cleaning.
Begin by gently touching the outside of the ear.
Reward your puppy.
Repeat for a few seconds.
Over time, introduce the cleaning supplies.
Let the puppy hear the sound of opening the bottle.
Reward calm behavior.
Eventually, your puppy can become comfortable with the entire routine.
Short, positive sessions are usually better than one long session.
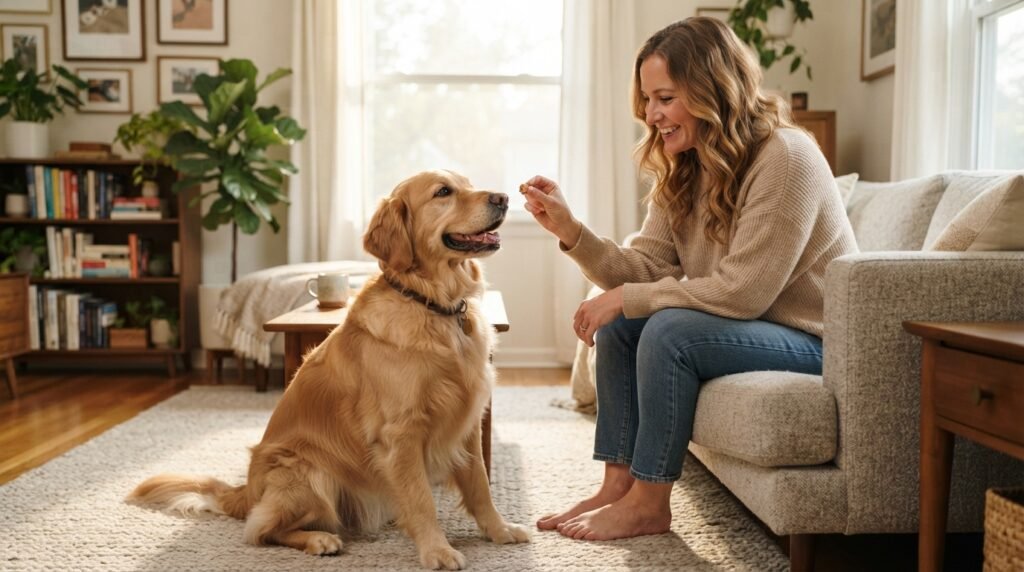
What About Dogs With Floppy Ears?
Floppy ears can make ear care more challenging because the ear flap can cover much of the opening.
Dogs with floppy ears aren’t automatically unhealthy, but owners should pay attention to changes in moisture, odor, wax, and irritation.
Regular observation becomes especially useful.
If your floppy-eared dog repeatedly develops ear problems, ask your veterinarian about a customized ear-care routine.
Should You Clean Your Dog’s Ears Every Week?
Not necessarily.
Some dogs may benefit from occasional cleaning, while others may need more frequent care.
The correct schedule depends on the individual dog.
Factors such as allergies, swimming, ear anatomy, wax production, and previous ear problems can influence cleaning needs.
Instead of choosing a schedule based on another dog, ask your veterinarian what makes sense for yours.
How to Store Dog Ear-Cleaning Products
Follow the product’s storage instructions.
Keep bottles closed when not in use and store them in a suitable location away from children and pets.
Check expiration information where applicable.
Don’t continue using a product if it has changed significantly in appearance, smell, or consistency.
When in doubt, replace it rather than taking unnecessary risks.
A Simple Maintenance Checklist
Use this simple routine when caring for your dog’s ears:
- Look at the ears regularly.
- Watch for unusual odor.
- Look for redness or swelling.
- Monitor scratching and head shaking.
- Dry the visible outer ear after bathing.
- Use only appropriate dog ear-care products.
- Avoid deep cleaning with cotton swabs.
- Stop if your dog shows pain.
- Contact your veterinarian for persistent symptoms.
- Reward calm behavior during grooming.
The Bottom Line
Dog ear cleaning doesn’t need to be complicated.
A gentle approach, regular observation, appropriate products, and good communication with your veterinarian can help keep ear care safe.
The most important thing is knowing when not to clean.
If your dog has severe pain, swelling, bleeding, unusual discharge, strong odor, balance problems, or persistent symptoms, professional veterinary evaluation is more important than another cleaning session.
Healthy ears are not necessarily perfectly spotless ears.
They are ears that are comfortable, free from concerning symptoms, and cared for appropriately.
With patience and consistency, ear care can become a normal part of your dog’s grooming routine rather than something both you and your dog dread.

hammadniazi6663@gmail.com
Contributor at PetZuoo, publishing practical information for pet owners and animal lovers.
Related guides
Why Do Dog Tilt Their Heads? 9 Fascinating Reason
Why Do Dog Tilt Their Heads? 9 Fascinating Reason Behind This Adorable Behavior. Have you ever spoken to your dog and watched…
Why Does Dog Suddenly Follow Me Everywhere? 9 Reasons
Why Does Dog Suddenly Follow Me Everywhere? 9 Reasons and Have you noticed that your dog suddenly seems to be your shadow?…
Ultimate Guide to Dog Separation Anxiety
Ultimate Guide to Dog Separation Anxiety. Proven Ways to Help Your Dog Feel Safe Alone, and Leaving your dog at home for…