The Ultimate Guide to Cleaning Your Dog or Cat’s Ears Safely at Home
Keeping your pet healthy goes beyond providing nutritious food, regular exercise, and plenty of affection. One important aspect of pet care that many owners overlook is ear hygiene. Clean ears help prevent infections, reduce discomfort, and allow your dog or cat to hear properly. While ear cleaning may seem intimidating at first, learning the correct technique can make it a simple part of your regular grooming routine.
Dogs and cats have different ear structures and different grooming habits, but both can develop ear problems if dirt, wax, moisture, or debris build up over time. Certain breeds are especially prone to ear issues because of their floppy ears, long hair, or narrow ear canals. Regular inspection and proper cleaning can help catch small problems before they become serious.
Why Ear Cleaning Matters
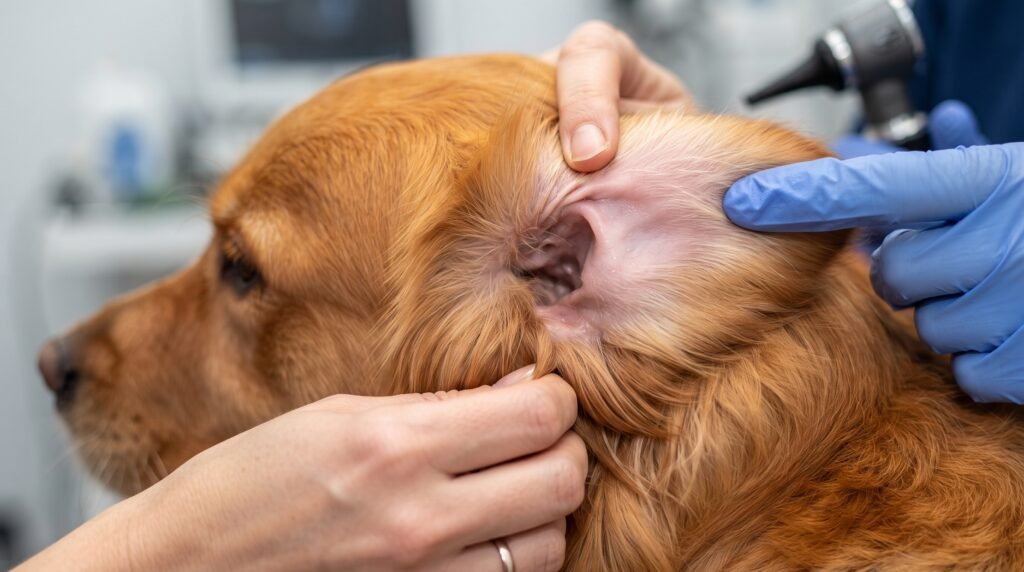
Healthy ears are clean, light pink inside, and free from strong odors. Over time, however, earwax, dust, pollen, and moisture can accumulate inside the ear canal. If these materials remain trapped, they create an environment where bacteria and yeast can grow.
Routine ear cleaning helps:
- Remove excess wax and dirt
- Reduce unpleasant odors
- Prevent bacterial and yeast infections
- Improve your pet’s comfort
- Allow you to spot health problems early
- Support overall grooming and hygiene
Cleaning your pet’s ears does not need to be done every week for every animal. Some pets naturally maintain clean ears, while others require more frequent attention. Understanding your individual pet’s needs is the key to keeping their ears healthy.

Which Pets Need Ear Cleaning Most Often?
Not every dog or cat requires the same ear care routine. Several factors influence how often cleaning is needed.
Dogs That May Need Frequent Ear Cleaning
Some breeds naturally produce more earwax or trap more moisture.
Examples include:
- Cocker Spaniels
- Basset Hounds
- Labrador Retrievers
- Golden Retrievers
- Poodles
- Cockapoos
Dogs that swim regularly or spend lots of time outdoors also benefit from more frequent ear inspections because water and debris can remain trapped inside the ears.
Cats That May Need Extra Attention
Most healthy cats keep their ears fairly clean while grooming. However, regular checks are still important for:
- Persian cats
- Scottish Folds
- Hairless Sphynx cats
- Senior cats
- Cats recovering from ear infections
- Outdoor cats exposed to dirt and parasites
Even if your cat rarely needs cleaning, monthly ear inspections can help identify problems before they worsen.
Signs Your Dog or Cat Needs Ear Cleaning
Checking your pet’s ears takes only a minute and can prevent many health issues.
Look for these signs:
- Visible brown or yellow wax
- Dirt inside the ear
- Mild odor
- Head shaking
- Scratching at the ears
- Rubbing ears against furniture or carpet
- Mild redness around the ear opening
These signs often indicate it’s time for a gentle cleaning. However, severe redness, swelling, bleeding, pus, or a strong foul smell may signal an infection and should be evaluated by a veterinarian before attempting to clean the ears.
Benefits of Regular Ear Checks
Even when your pet’s ears appear healthy, regular inspections offer several advantages.
You can:
- Detect ear mites early
- Notice allergic reactions
- Find grass seeds or foreign objects
- Monitor wax production
- Watch for inflammation
- Prevent painful infections
- Save money on veterinary treatment by catching issues early
Most owners discover that once ear inspections become part of their grooming routine, the process takes less than a minute.
Understanding the Ear Canal
Dogs and cats have an L-shaped ear canal rather than the straight ear canal humans have. This unique structure protects the eardrum but also makes it easier for wax, moisture, and debris to become trapped.
Because of this shape:
- Never insert cotton swabs deep into the ear.
- Always use a veterinarian-approved ear-cleaning solution.
- Clean only the visible portions unless directed otherwise by your veterinarian.
Using improper tools can push debris deeper into the ear, increasing the risk of injury or infection.
How Often Should You Clean Your Dog or Cat’s Ears?
One of the biggest mistakes pet owners make is cleaning their pet’s ears too often. While regular ear care is important, excessive cleaning can strip away the ear’s natural protective oils, causing irritation and making infections more likely.
The ideal cleaning schedule depends on your pet’s breed, lifestyle, and overall ear health.
Dogs
Most healthy dogs only need ear cleaning every 4–8 weeks. However, some may require more frequent care.
Your dog may need cleaning more often if they:
- Have floppy ears that trap moisture
- Swim regularly
- Spend a lot of time outdoors
- Have allergies
- Produce excess earwax
- Have had previous ear infections
Cats
Cats generally require less frequent ear cleaning because they groom themselves effectively.
Most healthy indoor cats only need their ears checked monthly and cleaned only when dirt or wax is visible.
Outdoor cats, senior cats, and breeds prone to wax buildup may need more regular inspections.
Supplies You’ll Need
Using the right tools makes ear cleaning safe, quick, and comfortable.
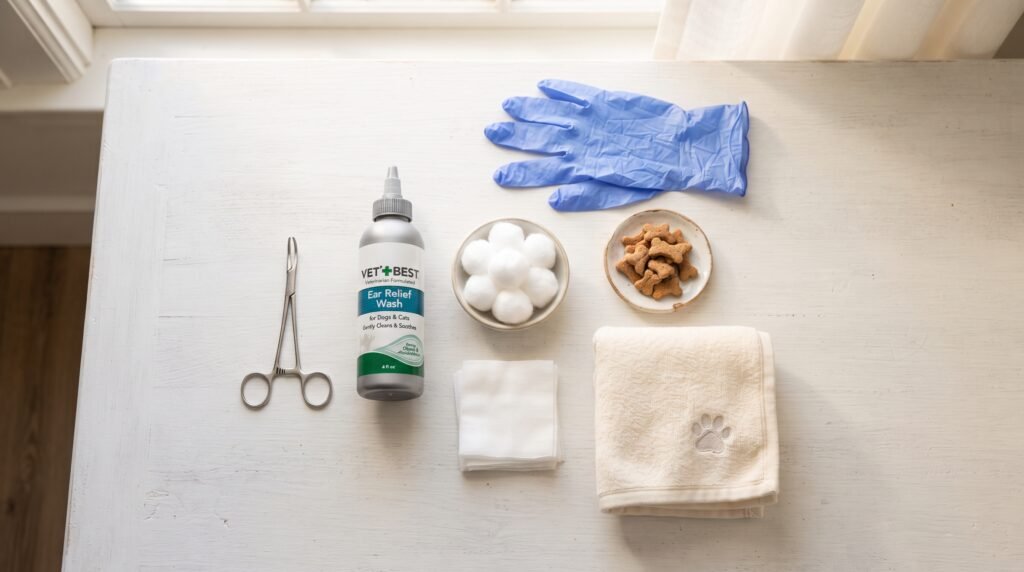
Essential Supplies
- Veterinarian-approved ear cleaning solution
- Cotton balls or soft gauze pads
- Soft towel
- Pet treats for positive reinforcement
- Disposable gloves (optional)
Avoid Using
Never use these items inside your pet’s ears:
- Cotton swabs (Q-tips)
- Alcohol
- Hydrogen peroxide
- Vinegar unless specifically recommended by your veterinarian
- Sharp or pointed objects
These products can irritate the delicate ear canal or push debris deeper into the ear.
Preparing Your Pet
A calm pet is much easier to handle during ear cleaning.
Choose a quiet room with minimal distractions.
Before starting:
- Wash your hands.
- Gather all supplies.
- Let your pet sniff the cleaning bottle.
- Speak in a calm, reassuring voice.
- Reward calm behavior with treats.
If your dog or cat becomes anxious, don’t force the process. Take a short break and try again later.
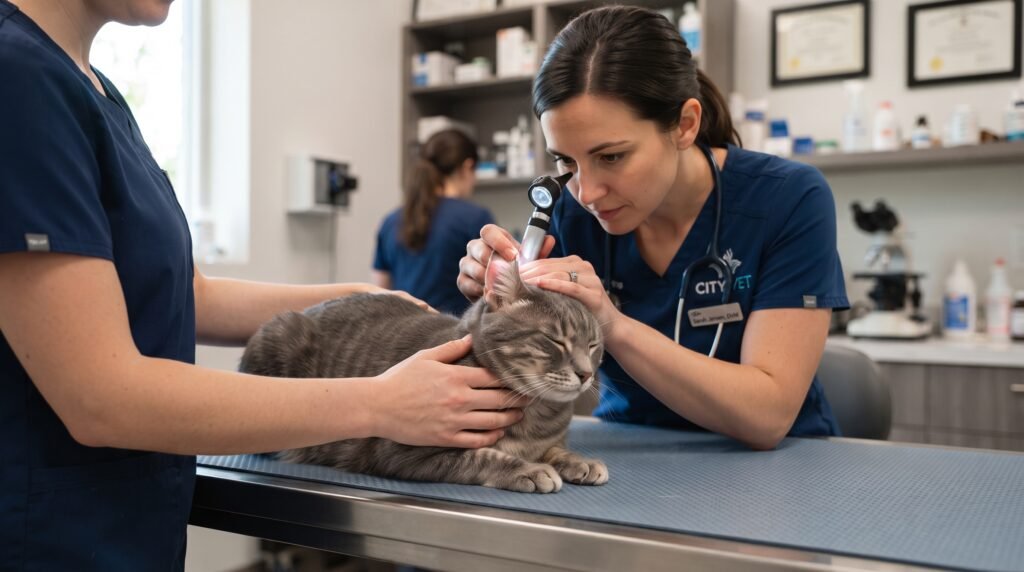
Step 1: Inspect the Ears
Always inspect the ears before cleaning.
Healthy ears should be:
- Light pink
- Clean
- Odor-free
- Free of swelling
- Free of discharge
Stop and contact your veterinarian if you notice:
- Thick yellow discharge
- Black debris resembling coffee grounds (possible ear mites)
- Blood
- Severe redness
- Swelling
- Strong foul odor
- Extreme pain when touched
Cleaning an infected ear without veterinary guidance can worsen the problem.
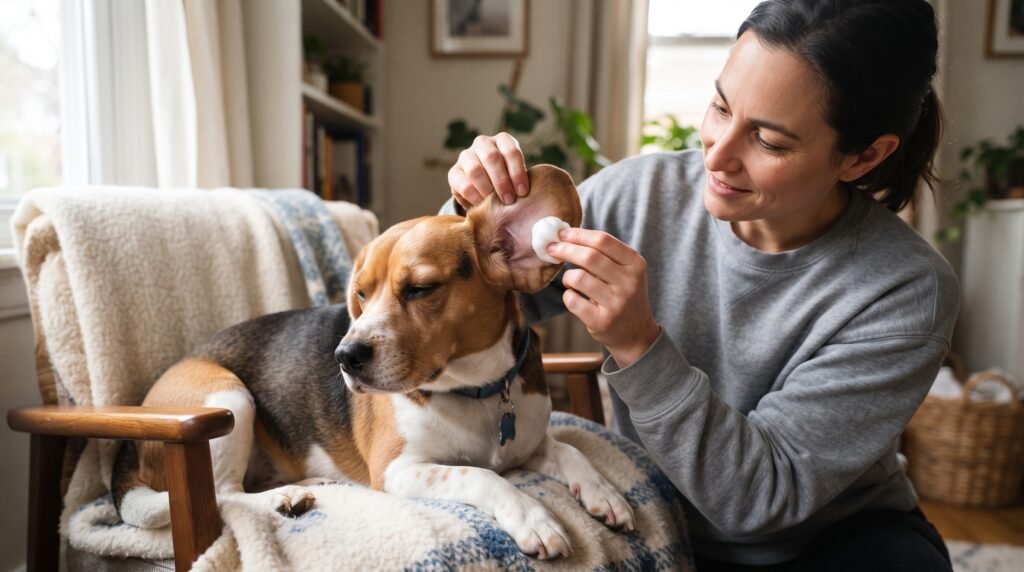
Step 2: Apply the Ear Cleaner
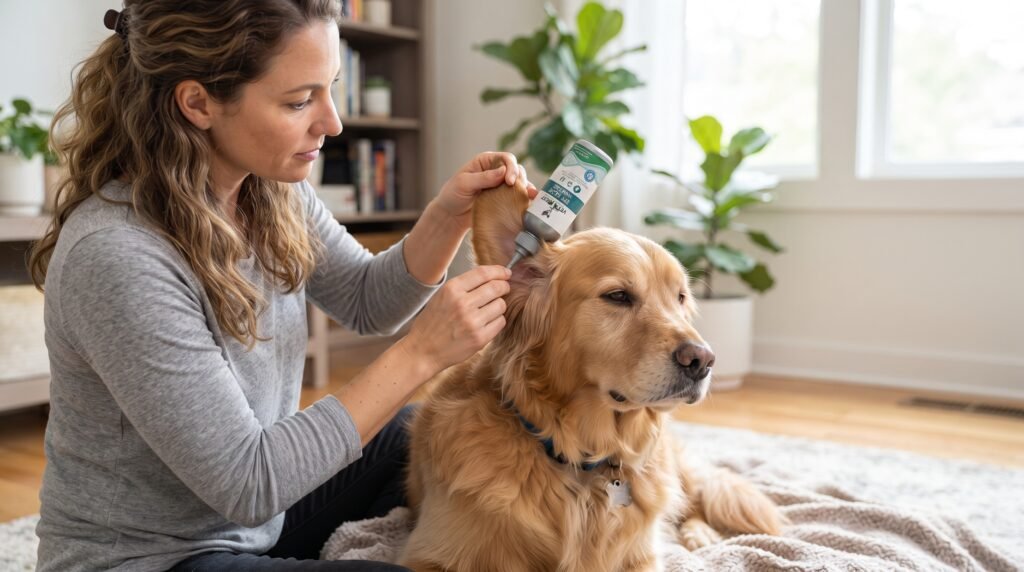
Once you’ve confirmed the ears appear healthy:
- Gently lift the ear flap.
- Hold the ear cleaner above the ear canal.
- Squeeze the recommended amount into the ear.
- Avoid inserting the bottle tip into the ear canal.
Keeping the bottle tip clean helps prevent contamination.
Step 3: Massage the Base of the Ear
After adding the cleaner:
- Fold the ear flap back into place.
- Massage the base of the ear for 20–30 seconds.
You should hear a soft squishing sound as the solution loosens wax and debris.
Many pets enjoy this gentle massage, making the process less stressful.
Step 4: Let Your Pet Shake
After massaging, step back and allow your pet to shake their head.
This natural reaction helps bring loosened debris to the outer ear where it can be wiped away easily.
Expect some cleaner to splatter, so placing a towel nearby can help keep the area clean.
Step 5: Wipe Away Dirt
Using a clean cotton ball or gauze pad:
- Wipe the visible part of the ear.
- Remove loosened wax and debris.
- Continue until the cotton comes away mostly clean.
Never push cotton deep into the ear canal.
Only clean what you can easily see.
Reward Your Pet
Finish every ear-cleaning session with:
- Praise
- Gentle petting
- A favorite treat
- A short play session
Positive reinforcement helps your dog or cat associate ear cleaning with a pleasant experience, making future sessions much easier.
Common Ear-Cleaning Mistakes to Avoid
Even with the best intentions, pet owners can make mistakes that lead to discomfort or increase the risk of ear infections. Avoiding these common errors will help keep your dog’s or cat’s ears healthy.
1. Cleaning Too Frequently
Cleaning too often can remove the natural oils that protect the ear canal. Unless your veterinarian recommends otherwise, clean your pet’s ears only when needed.
2. Using Cotton Swabs
Cotton swabs (Q-tips) can push wax and debris deeper into the ear canal and may even damage the eardrum. Stick to cotton balls or gauze for cleaning the visible part of the ear.
3. Using Human Ear Products
Human ear drops and cleaning solutions are not designed for pets. Always use a veterinarian-approved ear cleaner made specifically for dogs or cats.
4. Ignoring Bad Odors
A strong or unpleasant smell coming from your pet’s ears is not normal. It often indicates an infection or excessive yeast growth that requires veterinary attention.
5. Cleaning an Infected Ear Without Advice
If your pet’s ears are swollen, painful, bleeding, or producing thick discharge, don’t attempt to clean them at home. Schedule a veterinary examination first.
Signs of an Ear Infection
Ear infections are one of the most common health problems in both dogs and cats. Early treatment can prevent more serious complications.
Watch for these warning signs:
- Constant head shaking
- Frequent scratching at the ears
- Red or swollen ear canals
- Yellow, green, or brown discharge
- Thick black debris
- Strong foul odor
- Pain when the ears are touched
- Loss of balance or walking in circles
- Whining or unusual irritability
If you notice any of these symptoms, contact your veterinarian as soon as possible.
Common Causes of Ear Problems
Understanding what causes ear issues can help you prevent them.
Some of the most common causes include:
Allergies
Food allergies and environmental allergies often cause inflammation inside the ears.
Moisture
Water trapped after bathing or swimming creates an ideal environment for bacteria and yeast.
Ear Mites
Ear mites are tiny parasites that are especially common in kittens and outdoor cats. They produce dark, crumbly debris that resembles coffee grounds.
Excess Hair
Some dogs grow thick hair inside the ear canal, trapping wax and reducing airflow.
Foreign Objects
Grass seeds, dirt, insects, and small plant materials can become lodged inside the ear, causing irritation and infection.
Tips for Preventing Ear Problems
A few simple habits can greatly reduce your pet’s risk of developing ear issues.
Check the Ears Weekly
A quick visual inspection helps you catch problems before they become serious.
Dry the Ears After Swimming
If your dog loves the water, gently dry the outer ear after every swim or bath.
Keep Grooming Regular
Long-haired breeds benefit from regular grooming around the ears to improve airflow.
Feed a Balanced Diet
Healthy skin supports healthy ears. A high-quality diet rich in essential fatty acids can help reduce inflammation.
Manage Allergies
If your pet has allergies, work with your veterinarian to control flare-ups before they lead to chronic ear infections.
Special Ear Care Tips for Dogs
Dogs generally require more ear maintenance than cats.
For dogs:
- Inspect ears after every outdoor adventure.
- Dry ears after swimming.
- Keep floppy ears clean and dry.
- Schedule regular grooming if excess hair grows inside the ear.
- Follow your veterinarian’s cleaning recommendations if your dog has chronic ear issues.
Special Ear Care Tips for Cats
Cats usually need less frequent ear cleaning, but they still benefit from regular monitoring.
For cats:
- Check ears during grooming sessions.
- Watch for signs of ear mites, especially in kittens.
- Never force ear cleaning if your cat becomes highly stressed.
- Keep indoor environments clean to reduce dust and allergens.
Regular observation is often more important than frequent cleaning.
Can Ear Problems Be Prevented?
While not every ear infection can be prevented, consistent care significantly lowers the risk.
The best prevention plan includes:
- Routine ear inspections
- Gentle cleaning only when necessary
- Keeping ears dry
- Maintaining good grooming habits
- Addressing allergies promptly
- Scheduling regular veterinary checkups
A proactive approach helps your pet stay comfortable and reduces the likelihood of painful infections.

Frequently Asked Questions (FAQs)
Can I use baby wipes to clean my pet’s ears?
No. Baby wipes are designed for human skin and may contain ingredients that can irritate your pet’s sensitive ear canal. Always use a veterinarian-approved ear-cleaning solution and soft cotton balls or gauze.
Is it normal for my dog or cat to have earwax?
Yes. A small amount of light brown or yellow earwax is normal and helps protect the ear canal. However, excessive wax, black debris, foul odors, or discharge may indicate an underlying problem that should be checked by a veterinarian.
How do I know if I’m cleaning my pet’s ears correctly?
You’re cleaning your pet’s ears correctly if you:
- Clean only the visible part of the ear.
- Use a pet-safe ear cleaner.
- Never insert cotton swabs or sharp objects into the ear canal.
- Stop if your pet shows signs of pain or discomfort.
- Reward your pet after each cleaning session.
If you’re unsure, ask your veterinarian to demonstrate the proper technique during your next visit.
What should I do if my pet hates ear cleaning?
Many pets are nervous about ear cleaning at first. Try these tips:
- Keep sessions short.
- Use plenty of treats and praise.
- Choose a quiet, familiar location.
- Handle the ears gently.
- Stop and try again later if your pet becomes overly stressed.
With patience and positive reinforcement, most pets become more comfortable over time.
Can I clean my pet’s ears after every bath?
Only if your veterinarian recommends it or if moisture has entered the ears. Otherwise, simply drying the outer ear with a soft towel is usually enough. Over-cleaning may cause irritation.
How often should I check my pet’s ears?
A quick ear inspection once a week is a good habit for most dogs and cats. Regular checks help you spot redness, wax buildup, odors, or other changes before they become serious.
Final Thoughts
Healthy ears are an important part of your pet’s overall well-being. By checking your dog or cat’s ears regularly, using the right cleaning products, and following safe cleaning techniques, you can help prevent infections and keep your furry companion comfortable.
Remember that every pet is different. Some dogs and cats rarely need ear cleaning, while others require more frequent care due to their breed, lifestyle, or medical history. Paying attention to your pet’s individual needs is the best way to maintain long-term ear health.
Never ignore persistent scratching, head shaking, foul odors, swelling, or unusual discharge. These signs often point to an ear infection or another medical issue that requires prompt veterinary care.
A few minutes of preventive care each month can save your pet from discomfort and help avoid costly treatments in the future. Make ear checks a regular part of your grooming routine, and you’ll be taking an important step toward a happier, healthier life for your dog or cat.
Key Takeaways
- Inspect your pet’s ears weekly for early signs of problems.
- Clean ears only when needed using a veterinarian-approved ear cleaner.
- Never insert cotton swabs or sharp objects into the ear canal.
- Keep ears dry after swimming or bathing.
- Seek veterinary care if you notice pain, swelling, discharge, or a strong odor.
- Positive reinforcement makes ear cleaning easier and less stressful for your pet.
By following these simple practices, you’ll help protect your pet from common ear issues and ensure they stay healthy, comfortable, and ready for all of life’s adventures.

hammadniazi6663@gmail.com
Contributor at PetZuoo, publishing practical information for pet owners and animal lovers.
Related guides
Why Do Dog Tilt Their Heads? 9 Fascinating Reason
Why Do Dog Tilt Their Heads? 9 Fascinating Reason Behind This Adorable Behavior. Have you ever spoken to your dog and watched…
Why Does Dog Suddenly Follow Me Everywhere? 9 Reasons
Why Does Dog Suddenly Follow Me Everywhere? 9 Reasons and Have you noticed that your dog suddenly seems to be your shadow?…
Ultimate Guide to Dog Separation Anxiety
Ultimate Guide to Dog Separation Anxiety. Proven Ways to Help Your Dog Feel Safe Alone, and Leaving your dog at home for…